

Making your own headbands and hair accessories is not only fun, but it also allows you to express your unique style. Imagine choosing your favorite colors and materials to craft something that’s just right for you. By learning to make DIY headbands and hair accessories, you can add a personal touch to each piece, ensuring no one else has the same one. Whether you’re dressing up for a special occasion or just want to spice up your everyday outfit, these homemade treasures are perfect. Plus, it’s a fantastic way to recycle bits of fabric and decorations you already have at home, making it a win-win for both your wardrobe and the planet. So, let’s dive into the world of DIY fashion and learn how to make these charming additions to your wardrobe!
What You’ll Need to Get Started
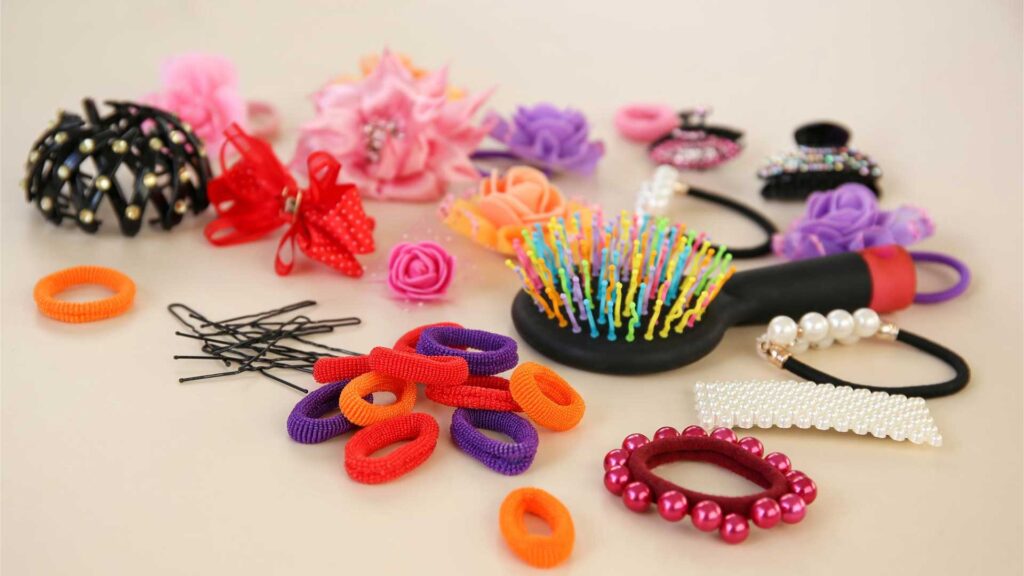
Before diving into the exciting world of creating your own headwear, it’s important to have all the right tools and materials on hand. Gather some basic supplies like fabric scraps, ribbons, and elastic bands. Fabric scraps can be any pieces of cloth left over from old projects or cut from worn-out clothes. They are perfect for adding a splash of color and pattern to your headbands.
Sewing essentials are a must. You’ll need a sewing needle and some thread. If you’re new to sewing, any general-purpose needle and thread will do. Choose thread colors that match or complement your fabric for a seamless look. These tools will help you attach pieces together and add any decorative elements securely.
Speaking of decorations, this is where you can let your creativity shine. Any decorative items you love, such as buttons, beads, or flowers, will make your headbands unique. Buttons can be from old clothing, beads may be from broken jewelry, and artificial flowers can be found at craft stores. The idea is to use what you love to make something that reflects your personal style.
Lastly, don’t forget the elastic bands. These are crucial for ensuring your headband fits snugly around your head. Elastic can be purchased from fabric or craft stores. Choose a width that feels comfortable and an appropriate length to go around your head. Remember, the more colorful and textured your materials, the more fun and vibrant your creations will be!
Now that you have your materials ready, you’re all set to start crafting headbands and hair accessories that are as unique as you are. Enjoy the process of mixing and matching different textures and colors. Remember, the key is to have fun and express your personal style!
Creating a Simple Fabric Headband

Choosing Your Fabric: The first step is to pick out the perfect fabric for your headband. Look for a soft, comfortable material that stretches a bit, like cotton or jersey. Bright colors or patterns add a fun twist, but you can also go for a solid color if you prefer something more versatile. Once you’ve chosen your fabric, you need to cut a strip that’s about 3 inches wide. The length should be enough to circle your head with a little extra, usually around 21 to 23 inches, depending on the size of your head.
Folding and Sewing: Now, take your fabric strip and fold it in half lengthwise with the right sides together—that means the side of the fabric you want to show on the outside should be facing inward. Line up the edges so they’re even. Then, using a sewing machine or a needle and thread, stitch along the long edge, about a quarter-inch from the edge. This will create a long tube of fabric.
Turning It Right Side Out: After sewing, you’ll need to turn the fabric tube right side out. This can be a bit tricky, but you can use a safety pin to help. Attach the safety pin to one end of the tube and feed it through the inside, pulling the fabric along with it. This will reverse the tube so that the right side of the fabric is now on the outside. Smooth out the fabric so it lays flat.
Adding Elastic: To make the headband stretchy and able to hold onto your head, you’ll need an elastic band. Cut a piece of elastic that’s about 5 to 6 inches long. Then, insert the elastic through one end of the fabric tube, making sure it reaches the other end. The elastic should be shorter than the fabric to create a gathered effect. Sew the ends of the elastic to the fabric securely, so it doesn’t slip out. Do this for both ends of the headband.
Finishing Touches: Finally, you need to close up the open ends of your headband. Fold the raw edges of the fabric inward to create a neat look, and then stitch across each end to secure them. This will also lock the elastic in place. Once you’ve done this on both sides, your headband is complete! Stretch it out a bit, then try it on and adjust as needed to ensure a comfortable fit.
Now you’ve made a custom, handcrafted headband that’s unique to you! Wear it for workouts, while doing chores, or as a stylish accessory for your outfits. It’s a simple project that adds a personal flair to your look.
Embellishing Your Headband
Ready to jazz up your headband? By adding a few embellishments, you can transform a simple accessory into a unique fashion statement. Here’s how to get creative with your headband:
Sewing on Buttons
Buttons aren’t just for shirts and coats—they can also add charm to your headband. Pick buttons that contrast with the color of your headband for a pop of interest or choose ones that match for a subtle, sophisticated look. Use a needle and thread to carefully sew the buttons on, making sure they’re secure. This way, they won’t fall off when you’re out and about.
Attaching Beads
Beads bring sparkle and texture to your accessory. You can string them together and sew them onto your headband in a pattern you love, or simply glue individual beads on for a quick and easy update. Play around with different sizes and colors to create a one-of-a-kind design.
Gluing on Fabric Flowers
Fabric flowers can give your headband a fun, feminine touch. Choose pre-made flowers from a craft store or make your own from fabric scraps. Hot glue works best for this—it’s strong and dries quickly. Arrange the flowers along the band, or cluster a few together on one side for an asymmetrical look. Remember, less is often more, so start with a few and add as needed.
When you mix and match colors and textures, you open up a world of possibilities for customizing your headbands. So, get creative and make a headband that showcases your personal style!
No-Sew Options for Quick and Easy Accessories
Not everyone is a fan of sewing, and that’s perfectly okay! There are still plenty of creative ways to make your own custom accessories without ever needing a needle and thread. One of the simplest methods is using fabric glue. This handy adhesive is great for adding all sorts of decorations to existing items. For example, you can spruce up a plain headband by gluing on sequins, beads, or fabric flowers to give it a fresh, new look.
Another easy option is to work with ribbons. With just a few folds and twists, you can create beautiful bows. Then, take your fabric glue and attach these bows onto hair clips. Suddenly, you’ve got yourself a brand-new hair accessory that adds flair to any outfit. And the best part? It’s totally unique to your style because you made it yourself.
Not only are these methods quick and simple, but they also allow for a lot of creativity. You can mix and match colors, experiment with different materials, and even combine various decorations to create something that’s one of a kind. Plus, since you’re not sewing, the process is much faster, and you can enjoy your new accessories in no time!
Remember, the key to successful no-sew projects is to let the glue dry completely before you wear your new accessory. This will ensure everything stays in place and looks perfect all day long. So go ahead, get creative and start personalizing your accessories with your own special touch!
Upcycled Treasures: Turning Old into New
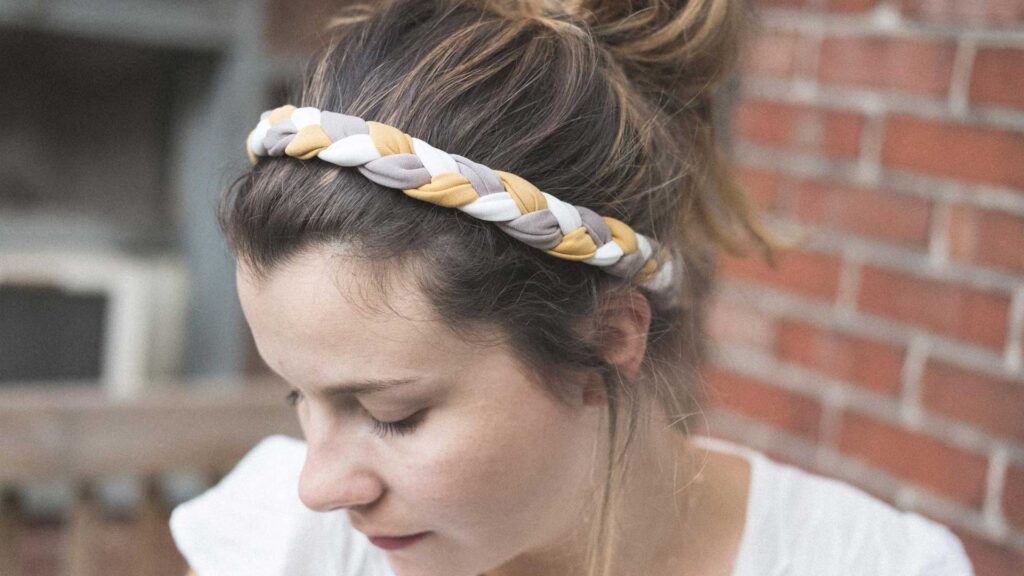
Got some old t-shirts or jeans lying around? Don’t rush to toss them out! With a bit of creativity, you can transform them into fashionable accessories. For example, you can cut them into strips and braid these strips to make a trendy, boho-chic headband. This is not only a fun activity but also a great way to give a second life to clothes that you no longer wear.
What about that broken necklace or the lone earring you’ve kept in your drawer? These can find new life too! Take them apart to salvage the beads and charms. You can then use these shiny bits to create unique hairpins or barrettes. Each piece you make will be one-of-a-kind, adding a special flair to your hairstyle. Plus, it’s a great way to keep memories alive by incorporating pieces of jewelry that may have sentimental value.
To start, you’ll need some basic tools like scissors, glue, and maybe some wire for shaping. Find a comfortable spot to work and lay out all your materials. Begin by sorting through your old jewelry to decide which pieces can be disassembled and used in your new creations. For your fabric headbands, choose colors and patterns from old clothes that complement each other. Then, get braiding! Once you’re done, you can secure the ends with some stitches or fabric glue.
Remember, the goal is to have fun and be creative. There are no strict rules in upcycling. It’s all about experimenting and making something that you will love to wear. Plus, by upcycling, you’re making an eco-friendly choice by reducing waste. So, you’re not just crafting—you’re also helping the planet!
Caring for Your Handcrafted Hair Accessories
When you put effort into creating your own hair accessories, you want them to last. To keep your self-made hair adornments looking fresh and fabulous, it’s essential to store them correctly. Find a cool, dry place away from direct sunlight to prevent colors from fading and materials from warping. If you have a drawer or a jewelry box, consider lining it with a soft fabric to protect your accessories from scratches. For items like hairbands or clips, you might even hang them on a small rack or a dedicated accessory holder. This not only keeps them organized but also easily accessible for your next hairstyle creation.
Cleaning your accessories is just as important as storing them properly, but it should be done with care. Avoid using strong cleaners, as they can be too harsh and damage the delicate materials of your handcrafted items. Instead, opt for a soft, damp cloth to wipe away any dust or dirt gently. If your hair accessory has fabric components and needs a deeper clean, consider using a mild soap mixed with water. Dip a soft cloth in the soapy water and carefully clean the fabric areas. Remember to pat them dry with a towel afterward, and let them air dry completely before storing to prevent any moisture damage.
Regular maintenance will ensure that your personal hair decorations continue to add a unique and creative touch to your look for years to come. By being mindful of how you handle and care for them, you’re not only preserving their beauty but also the time and love you invested in making them. Treat them with the same tenderness you would with a store-bought treasure, and they will keep their charm and character for a long time.
Sharing Your Creations with the World
Once you’ve become skilled at crafting your own headbands and hair adornments, it’s a great idea to share your work with those around you. Creating these items for your friends and family is not only a fun project, but also a way to give them something special and unique. Handmade gifts like these often hold more sentimental value because they are infused with your personal touch and effort.
Begin by considering the styles and colors your friends and family love. Do they prefer bright and bold patterns, or are they more inclined to wear subtle, pastel shades? Understanding their preferences will guide you in selecting the perfect materials and designs for their custom headbands and hair accessories.
Next, gather your materials. Look for quality fabrics, ribbons, beads, and any other embellishments you think would add a special flair to your creations. Remember, the durability and comfort of the headband are just as important as its appearance, so choose materials that will feel good and last a long time.
As you create each piece, think about adding a personal touch. For instance, if you’re making a headband for someone who loves nature, you might include floral patterns or earthy tones. For a friend who enjoys glamor, consider attaching some sparkling gems or elegant lace.
Finally, present your gift thoughtfully. Wrap the headband or hair accessory in pretty paper or place it inside a charming box. A handwritten note explaining the thought behind the design can make your gift even more meaningful. By doing this, you’re not just giving a beautiful accessory, but also a memorable experience.
Sharing your handcrafted headbands and hair adornments can be a delightful way to show care and creativity. Plus, it’s a chance to practice your skills and perhaps even inspire others to start their own crafting journey. So, go ahead and brighten someone’s day with a piece of your artistry!
DIY headbands and hair accessories are a fantastic way to add a personal touch to your style. With a little bit of creativity and some basic materials, you can create something truly special. So go ahead, get crafty, and let your personality shine through your very own handmade creations!